BroadcastServiceProvider
BroadcastServiceProvider主要包含了Broadcast相关的五个驱动器、Broadcast事件、Broadcast
队列等方法,比较简单就不在解析了,今天主要说说怎么通过ably来驱动Broadcast的。具体使用可以查看上一篇文章的讲解。
之前了解过 Laravel 的ServiceProvider
的工作原理,所以我们就不用赘述太多这方面的流程了,我们主要看看BroadcastServiceProvider的注册方法:
class BroadcastServiceProvider extends ServiceProvider implements DeferrableProvider
{
    /**
     * Register the service provider.
     *
     * @return void
     */
    public function register()
    {
        $this->app->singleton(BroadcastManager::class, fn ($app) => new BroadcastManager($app));

        $this->app->singleton(BroadcasterContract::class, function ($app) {
            return $app->make(BroadcastManager::class)->connection();
        });

        $this->app->alias(
            BroadcastManager::class, BroadcastingFactory::class
        );
    }

    /**
     * Get the services provided by the provider.
     *
     * @return array
     */
    public function provides()
    {
        return [
            BroadcastManager::class,
            BroadcastingFactory::class,
            BroadcasterContract::class,
        ];
    }
}
其中,我们先来看 BroadcastingFactory 和 BroadcasterContract。
interface Factory
{
    /**
     * Get a broadcaster implementation by name.
     *
     * @param  string|null  $name
     * @return \Illuminate\Contracts\Broadcasting\Broadcaster
     */
    public function connection($name = null);
}
不用怎么过代码,基本可以看出就是让系统通过 config 查找使用哪种 driver 来做广播分发,具体看代码:
protected function resolve($name)
{
    $config = $this->getConfig($name);

    if (is_null($config)) {
        throw new InvalidArgumentException("Broadcast connection [{$name}] is not defined.");
    }

    if (isset($this->customCreators[$config['driver']])) {
        return $this->callCustomCreator($config);
    }

    $driverMethod = 'create'.ucfirst($config['driver']).'Driver';

    if (! method_exists($this, $driverMethod)) {
        throw new InvalidArgumentException("Driver [{$config['driver']}] is not supported.");
    }

    return $this->{$driverMethod}($config);
}
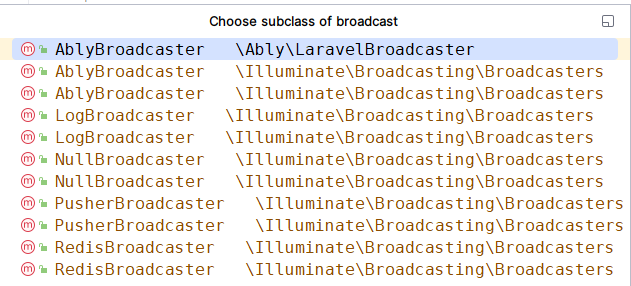
Laravel 大量使用这样的写法:'create'.ucfirst($config['driver']).'Driver',系统提供5个
drivers,那每一个都对应一个这种方法,如本文想看的就是:createAblyDriver:
/**
 * Create an instance of the driver.
 *
 * @param  array  $config
 * @return \Illuminate\Contracts\Broadcasting\Broadcaster
 */
protected function createAblyDriver(array $config)
{
    return new AblyBroadcaster($this->ably($config));
}

/**
 * Get an Ably instance for the given configuration.
 *
 * @param  array  $config
 * @return \Ably\AblyRest
 */
public function ably(array $config)
{
    return new AblyRest($config);
}
回过头来,继续看另一个接口 Broadcaster:
interface Broadcaster
{
    /**
     * Authenticate the incoming request for a given channel.
     *
     * @param  \Illuminate\Http\Request  $request
     * @return mixed
     */
    public function auth($request);

    /**
     * Return the valid authentication response.
     *
     * @param  \Illuminate\Http\Request  $request
     * @param  mixed  $result
     * @return mixed
     */
    public function validAuthenticationResponse($request, $result);

    /**
     * Broadcast the given event.
     *
     * @param  array  $channels
     * @param  string  $event
     * @param  array  $payload
     * @return void
     *
     * @throws \Illuminate\Broadcasting\BroadcastException
     */
    public function broadcast(array $channels, $event, array $payload = []);
}
这里我们重点看 broadcast() 函数。其中我们的 5 个 drivers 都实现了这个方法
在 ably driver 实现这个函数的,正是上文的创建的对象:AblyBroadcaster,我们往深入查看,如何实现 broadcast:
public function broadcast(array $channels, $event, array $payload = [])
{
    try {
        foreach ($this->formatChannels($channels) as $channel) {
            $this->ably->channels->get($channel)->publish(
                $this->buildAblyMessage($event, $payload)
            );
        }
    } catch (AblyException $e) {
        throw new BroadcastException(
            sprintf('Ably error: %s', $e->getMessage())
        );
    }
}
这就好理解了,主要是遍历所有channels,然后每个channel 发布消息。
到此为止,基本其他的 drivers 也是这种逻辑,
其中,涵盖了 config 配置中的几个 drivers:
'connections' => [

    'pusher' => [
        'driver' => 'pusher',
        'key' => env('PUSHER_APP_KEY'),
        'secret' => env('PUSHER_APP_SECRET'),
        'app_id' => env('PUSHER_APP_ID'),
        'options' => [
            'host' => env('PUSHER_HOST') ?: 'api-'.env('PUSHER_APP_CLUSTER', 'mt1').'.pusher.com',
            'port' => env('PUSHER_PORT', 443),
            'scheme' => env('PUSHER_SCHEME', 'https'),
            'encrypted' => true,
            'useTLS' => env('PUSHER_SCHEME', 'https') === 'https',
        ],
        'client_options' => [
            // Guzzle client options: https://docs.guzzlephp.org/en/stable/request-options.html
        ],
    ],

    'ably' => [
        'driver' => 'ably',
        'key' => env('ABLY_KEY'),
    ],

    'redis' => [
        'driver' => 'redis',
        'connection' => 'default',
    ],

    'log' => [
        'driver' => 'log',
    ],

    'null' => [
        'driver' => 'null',
    ],

],
分发信息过程
先从分发广播事件开始说起:
if (! function_exists('broadcast')) {
    /**
     * Begin broadcasting an event.
     *
     * @param  mixed|null  $event
     * @return \Illuminate\Broadcasting\PendingBroadcast
     */
    function broadcast($event = null)
    {
        return app(BroadcastFactory::class)->event($event);
    }
}

...

public function event($event = null)
{
    return new PendingBroadcast($this->app->make('events'), $event);
}
今天的主角不是 EventsServiceProvider,但需要用到他的 dispatch方法:
/**
 * Handle the object's destruction.
 *
 * @return void
 */
public function __destruct()
{
    $this->events->dispatch($this->event);
}

...

public function dispatch($event, $payload = [], $halt = false)
{
    // When the given "event" is actually an object we will assume it is an event
    // object and use the class as the event name and this event itself as the    // payload to the handler, which makes object based events quite simple.    [$event, $payload] = $this->parseEventAndPayload(
        $event, $payload
    );

    if ($this->shouldBroadcast($payload)) {
        $this->broadcastEvent($payload[0]);
    }

    $responses = [];

    foreach ($this->getListeners($event) as $listener) {
        $response = $listener($event, $payload);

        // If a response is returned from the listener and event halting is enabled
        // we will just return this response, and not call the rest of the event        // listeners. Otherwise we will add the response on the response list.        if ($halt && ! is_null($response)) {
            return $response;
        }

        // If a boolean false is returned from a listener, we will stop propagating
        // the event to any further listeners down in the chain, else we keep on        // looping through the listeners and firing every one in our sequence.        if ($response === false) {
            break;
        }

        $responses[] = $response;
    }

    return $halt ? null : $responses;
}
我们暂且看:
if ($this->shouldBroadcast($payload)) {
    $this->broadcastEvent($payload[0]);
}
...

protected function broadcastEvent($event)
{
    $this->container->make(BroadcastFactory::class)->queue($event);
}
再一次回到了 BroadcastManager:
public function queue($event)
{
    if ($event instanceof ShouldBroadcastNow ||
        (is_object($event) &&
         method_exists($event, 'shouldBroadcastNow') &&
         $event->shouldBroadcastNow())) {
        return $this->app->make(BusDispatcherContract::class)->dispatchNow(new BroadcastEvent(clone $event));
    }

    $queue = null;

    if (method_exists($event, 'broadcastQueue')) {
        $queue = $event->broadcastQueue();
    } elseif (isset($event->broadcastQueue)) {
        $queue = $event->broadcastQueue;
    } elseif (isset($event->queue)) {
        $queue = $event->queue;
    }

    $broadcastEvent = new BroadcastEvent(clone $event);

    if ($event instanceof ShouldBeUnique) {
        $broadcastEvent = new UniqueBroadcastEvent(clone $event);

        if ($this->mustBeUniqueAndCannotAcquireLock($broadcastEvent)) {
            return;
        }
    }

    $this->app->make('queue')
        ->connection($event->connection ?? null)
        ->pushOn($queue, $broadcastEvent);
}
这里可以看出,如果我们创建的 Event 如果继承 ShouldBroadcastNow,或者写了 broadcastQueue
等,则执行对应的方法,我们如果啥都不写,则直接调用默认的队列。
$this->app->make('queue')
    ->connection($event->connection ?? null)
    ->pushOn($queue, $broadcastEvent);
这里包含了 QueueServiceProvider ,如果你还需要你的 Event 使用哪种 Queue 驱动,则可以在 Event
中明确定义。最后,我们看方法 pushOn:
public function pushOn($queue, $job, $data = '');

...

// 不同的队列驱动,做法不一样,我们看默认的驱动是如何执行这个job,即:broadcastEvent
'default' => env('QUEUE_CONNECTION', 'sync'),

public function push($job, $data = '', $queue = null)
{
    $queueJob = $this->resolveJob($this->createPayload($job, $queue, $data), $queue);

    try {
        $this->raiseBeforeJobEvent($queueJob);

        $queueJob->fire();

        $this->raiseAfterJobEvent($queueJob);
    } catch (Throwable $e) {
        $this->handleException($queueJob, $e);
    }

    return 0;
}
这里,先组装队列内容,然后在fire,其中关注的就是 createPayload 中的:
'job' => 'Illuminate\Queue\CallQueuedHandler@call',
...
'data' => [
    'commandName' => $job,
    'command' => $job,
],
然后在 fire 函数中拿出来使用:
public function fire()
{
    $payload = $this->payload();

    [$class, $method] = JobName::parse($payload['job']);

    ($this->instance = $this->resolve($class))->{$method}($this, $payload['data']);
}
也就是调用 CallQueuedHandler 的 call 函数,最终我们聚焦到这个函数中:
public function dispatchNow($command, $handler = null)
{
    $uses = class_uses_recursive($command);

    if (in_array(InteractsWithQueue::class, $uses) &&
        in_array(Queueable::class, $uses) &&
        ! $command->job) {
        $command->setJob(new SyncJob($this->container, json_encode([]), 'sync', 'sync'));
    }

    if ($handler || $handler = $this->getCommandHandler($command)) {
        $callback = function ($command) use ($handler) {
            $method = method_exists($handler, 'handle') ? 'handle' : '__invoke';

            return $handler->{$method}($command);
        };
    } else {
        $callback = function ($command) {
            $method = method_exists($command, 'handle') ? 'handle' : '__invoke';

            return $this->container->call([$command, $method]);
        };
    }

    return $this->pipeline->send($command)->through($this->pipes)->then($callback);
}
到达这里,分发Event事件,也快看到曙光了,更多的是执行 handle,也就是上文创建 Job 的 BroadcastEvent 类中的 handle
方法:
public function handle(BroadcastingFactory $manager)
{
    $name = method_exists($this->event, 'broadcastAs')
            ? $this->event->broadcastAs() : get_class($this->event);

    $channels = Arr::wrap($this->event->broadcastOn());

    if (empty($channels)) {
        return;
    }

    $connections = method_exists($this->event, 'broadcastConnections')
                        ? $this->event->broadcastConnections()
                        : [null];

    $payload = $this->getPayloadFromEvent($this->event);

    foreach ($connections as $connection) {
        $manager->connection($connection)->broadcast(
            $channels, $name, $payload
        );
    }
}
这里可以看出,和我们事件写法有很多关联的地方了,如果事件设置广播名称,则使用设置的,如果没有,则使用类名,在上一篇文章的截图可见;获取 broadcastOn()
中定义的 channels 数组;还有一些定义的 Payload,Event事件是否通过多个 connections 来传播。
最后就是调用各个 broadcast传播出去。
至此,我们才正式进入各个自定义驱动的执行过程,如使用 Ably 驱动。
Ably 如何实现发布消息
public function broadcast($channels, $event, $payload = [])
{
    try {
        foreach ($this->formatChannels($channels) as $channel) {
            $this->ably->channels->get($channel)->publish(
                $this->buildAblyMessage($event, $payload)
            );
        }
    } catch (AblyException $e) {
        throw new BroadcastException(
            sprintf('Ably error: %s', $e->getMessage())
        );
    }
}
在上一篇文章说了,如果是订阅 channel,记得需要加上public之类的前缀,主要是因为:
protected function formatChannels(array $channels)
{
    return array_map(function ($channel) {
        $channel = (string) $channel;

        if (Str::startsWith($channel, ['private-', 'presence-'])) {
            return str_starts_with($channel, 'private-')
                ? Str::replaceFirst('private-', 'private:', $channel)
                : Str::replaceFirst('presence-', 'presence:', $channel);
        }

        return 'public:'.$channel;
    }, $channels);
}
在 Laravel 结构化 Channel 名称了,然后构建符合 Ably 下发的数据内容,然后执行 publish 函数下发:
public function publish(...$args) {
    $first = $args[0];
    $params = [];

    if ( is_string( $first ) ) { // eventName, data[, clientId][, extras]
        $msg = new Message();
        $msg->name = $first;
        $msg->data = $args[1];
        // TODO RSL1h: Remove clientId/extras extras support for 2.0
        $argsn = count($args);
        if ( $argsn == 3 ) {
            if ( is_string($args[2]) )
                $msg->clientId = $args[2];
            else if ( is_array($args[2]) )
                $msg->extras = $args[2];
        } else if ( $argsn == 4 ) {
            $msg->clientId = $args[2];
            $msg->extras = $args[3];
        }

        $request_body = $this->__publish_request_body($msg);
    } else {
        $request_body = $this->__publish_request_body($first);
        if ( count($args) > 1 ) {
            $params = $args[1];
        }
    }

    $url = $this->channelPath . '/messages';
    if (!empty($params)) {
        $url .= '?' . Stringifiable::buildQuery( $params );
    }

    $this->ably->post( $url, $headers = [], $request_body );
    return true;
}
具体的代码这里就不再继续解读下去了。今天主要是串一遍 BroadcastServiceProvider 源代码流程。
如果觉得文章内容对您有用 打赏
